I came across a blog* recently that had a recipe for biscuits which led me to another* with a recipe for biscuits. Now, I’m not saying those recipes aren’t any good. I’m just saying my mama’s recipe is perfect!
Hah! … you say?
Well, I guess you’ll never know until you make all three recipes. I’d start with this one …
Mama’s Perfect Biscuits
Ingredients:
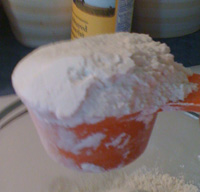
 3 heaping half-cups of self rising flour
1 over-loaded serving spoon of shortening
1 cup plus of buttermilk
About ingredients …
 I use Martha White flour and Crisco shortening. I suppose you could use something else but don’t go blaming me if your biscuits don’t turn out as good as mine. I scoop it out with a half cup measuring cup. Just dig into the canister and pull out a big scoop. (If some falls off the scoop, don’t worry, you just didn’t need it yet.)
 My granny used lard in her biscuits but somewhere along in the ’70s my mom nixed that and started using shortening. (It’s vegetable instead of animal fat so a lot less heart attack inducing in the long run.) Anyway, that’s why this is my mom’s biscuit recipe instead of my granny’s.
It’s hard to say exactly how much buttermilk you’ll need but it’s somewhere between a cup and a pint (usually, closer to the pint). You’ll get a better idea of how much to use in just a minute.
Directions:
 Pre-heat oven to 500°.
Yes, 500! Not, 475, or 480, or 490, or even 495. It has to be 500 to make perfect biscuits.
Cream together the flour and shortening.
 When this is done correctly, you end up with tiny little bits of what looks like flour on steroids. If it looks like Dippin’ Dots, you’ve gone too far with the shortening and need to add some flour.
 I use a clear glass mixing bowl. My Granny used a wooden bowl that she never (and I mean never) washed. As far as I know nobody ever got food poisoning from Granny’s biscuits but I’d just as soon not take any chances. (BTW, except for the lard, this really is her recipe.) Sadly, the wooden bowl in the picture over there isn’t Granny’s biscuit bowl — one of my aunts has Granny’s bowl. I just lucked up one day and found this one, which is just like Granny’s, at a junk shop. Can’t imagine why anyone would ever let go of such a treasure.
Pour in some buttermilk and stir with spoon.
Start with about half a cup and work your way up from there. My mom and my granny both used their hands to do the mixin’ but, even though I’ve washed my hands first, I just can’t bring myself to do that so I use the spoon from the shortening. I mean why mess up another spoon?
 Keep adding buttermilk and mixing it in until the biscuit dough becomes almost runny.
Almost runny means solid enough to hold together but liquid enough to dump out of the bowl pretty easy. It’s when the dough sort of starts slipping through your fingers if you try to pick it up out of the bowl. It’s kind of like the consistency of wet cement. Or, soft serve ice cream. (Okay, I can live with that image.) If it actually slips through your fingers then add some flour. If, when you dump it from the bowl, it runs all over your counter instead of sitting there like a lump, then scrape it back into the bowl and add some more flour.
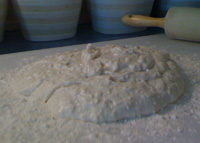
 Dump mixture onto a floured surface.
Though I use a big cutting board to roll out biscuits, it’s nice if you have one of those neat baker’s sheets with circles on it that helps you roll out a perfectly shaped pie crust but, if you don’t have one of those, then your kitchen counter will work just as well. After all, this isn’t precision biscuit making. Nobody’s going to test you to see if your biscuit dough rolls out perfectly round. I do recommend, however, that the counter top get a good scrubbing before you start rolling out biscuits on it. Especially, if you have cats. Food poisoning is not pleasant.
 Sprinkle flour on top of dough and fold over.
Sprinkle flour onto dough and fold over again. Repeat as needed. (Don’t flour and fold 50 times or it’ll make your biscuit dough too stiff. Ten to fifteen fold-overs is plenty.)
What this does is it adds air and flour to the dough in layers which makes for flakier biscuits. It also gets them to the consistency needed to be able to cut them nicely. (This process comes in really handy if you’ve made your dough too runny. If that’s the case, you might need more than fifteen fold-overs.)
 Roll out your biscuit dough.
Rub flour onto your rolling pin then roll the dough to a thickness of about half an inch.
You can roll them out thicker or thinner, depending on how you like your biscuits. Half an inch just happens to work for me.
 Cut biscuits, place in pan, and pop into preheated oven.
When you’re cutting biscuits, jiggle your cutter a tiny bit to open up enough room to get a finger under the biscuit. Makes picking them up and putting them in the pan much easier.
Do not grease that pan!
Do not spread melted butter or put pats of butter on top of biscuits!
Purity in biscuits is essential!
 Place pan in center of oven and bake 10 to 15 minutes.
How long you bake biscuits really depends on how brown you like them. And, of course, it depends on how your oven cooks. Trial and error will help you figure out the perfect time. If they’re getting too brown too quickly, do not reduce the oven temp. Just take them out of the oven sooner.
 Serve hot … that means right out of the oven!
Everybody should be sitting at the table anxiously awaiting that first hot biscuit when those puppies come out of that oven. There is nothing, and I mean nothing, at least as far as foodstuffs, that comes even close to being as good as a hot biscuit with melted butter inside. Once they start to cool, then it’s time for the country ham or honey or jam or whatever other biscuit filler you have on hand. But when they’re pipin’ hot, it’s butter time.
FYI, margarine is not allowed. (I mean that!)
 From beginning to end, it takes about 30 minutes to make perfect biscuits. (If it’s taking you any longer than that, then get the lead out!)
I like to serve my biscuits in a sea grass basket I bought while on vacation to Charleston with my daughter a few years ago. I found it at a road-side stand run by an old Gullah woman and her granddaughter. She makes them by hand and was sharing that knowledge and tradition with her family. Maybe I’m just a silly old Southern girl but Mom’s biscuits and that sea grass basket are connected, at least they are for me.
About biscuit cutters …
You can use just about anything to cut biscuits. Some folks use water glasses, or if they want angel biscuits they use shot classes. I use an old cookie cutter that’s about as weathered as I am. I also have a couple of shiny new cookie cutters (with frilly edges) that I use if I want smaller or larger biscuits.
About pans …
 When it comes to pans, the older and more used the better. You can use a shiny new pan, or even a cookie sheet, but the best biscuits come from lovingly used biscuit pans. By that I mean that baking biscuits is the only thing that pan is ever used for. I have one that’s about 7′ by 11″ and is 1.5 ” deep that has never been used for anything else and it makes great biscuits.
When you go shopping for the perfect biscuit pan, don’t get one of those non-stick pans. Those things can just ruin a good biscuit. Be sure to get one that is deep enough — 1 inch works great. Also, unless you have a large family and need to double or triple this recipe, get one that holds about 12 average size biscuits comfortably. Biscuits don’t need a lot of room to expand sideways. They come out too flat if they have too much elbow room. They need to be a teensy bit crowded in the pan, even smooshing up against one another, to rise correctly.
I think I tried about four different pans before I found my perfect biscuit pan. I’m sure that if you make a sincere effort to look for it, you’ll find your perfect biscuit pan as well.
Fair warning …
 Once you start making perfect biscuits, your family will no longer want to settle for toast or muffins or any of those other breakfast breads.
Don’t believe me? That’s okay, you’ll see.
This recipe makes a dozen average size biscuits so it feeds two.
Maybe three in a pinch.
♥ ♥ ♥ ♥ ♥ ♥ ♥ ♥ ♥ ♥ ♥ ♥ ♥ ♥ ♥ ♥ ♥
I hope you enjoy my mom’s biscuit recipe as much as I have over the years. With my daughter out on her own, I don’t make them as often as I used to so am a little out of practice. You see, that’s the thing about biscuits, you have to make them often. You have to keep in practice to make really good biscuits.
♥ ♥ ♥ ♥ ♥ ♥ ♥ ♥ ♥ ♥ ♥ ♥ ♥ ♥ ♥ ♥ ♥
* Check out Domesticated Dilettante’s blog at http://domesticateddilettante.wordpress.com/ and the Southern Plate blog at http://www.southernplate.com/ You’ll find great recipes at both sites.
 Ingredients:


